


Hooligan Scale Models
AWD 4 Engine dragster
AWD 4 Engine dragster
Couldn't load pickup availability
Another fun simple kit!
- length - 163.2 mm
- width - 67.2 mm
- height - 44.8 mm
- length of the longest part - 154 mm
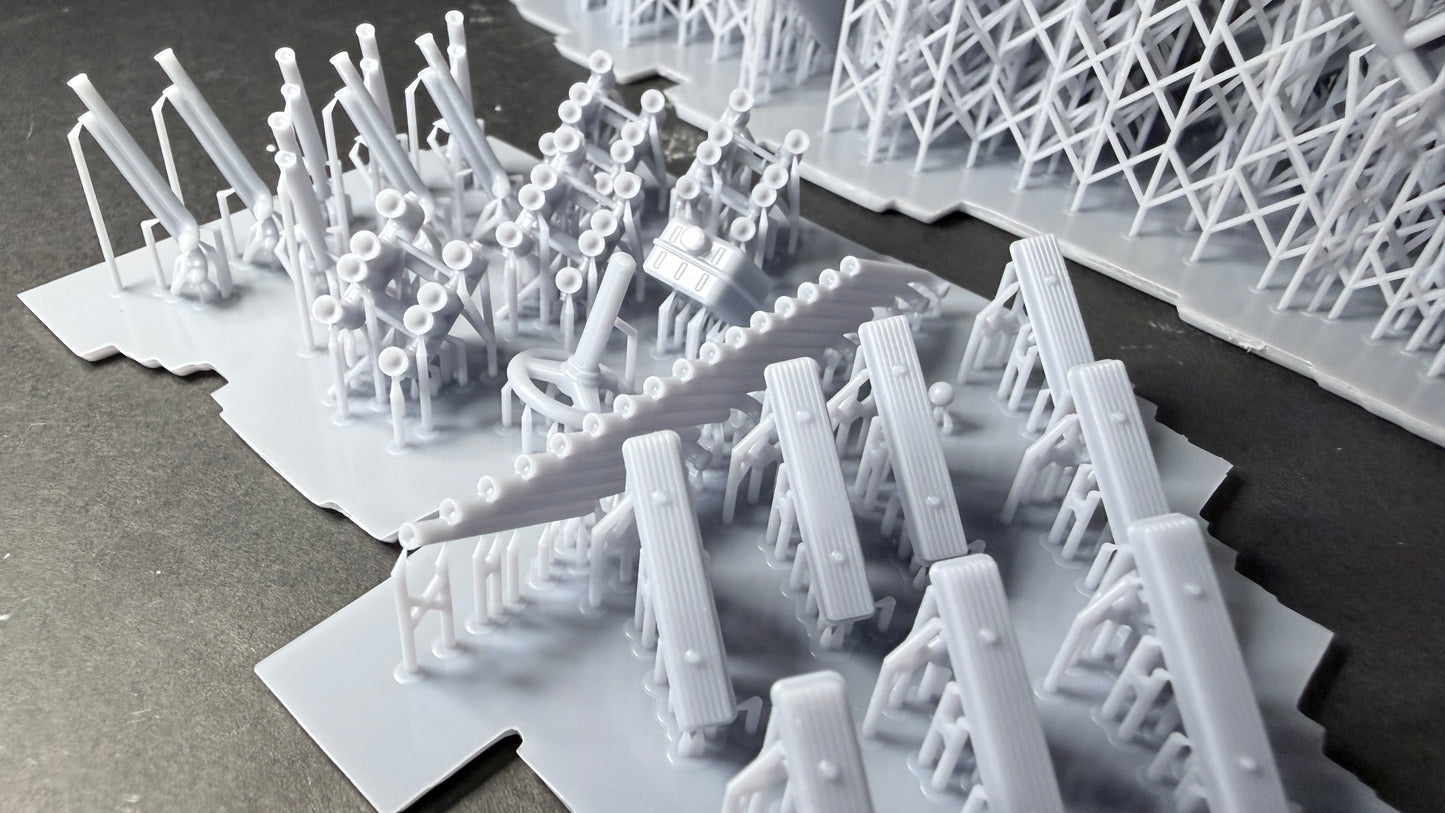
The model consists of parts: Air intakes, Central exhaust pipes, Frame, Front rims, Head covers, Left engines, Left exhaust pipes, Parachute bag, Rear rims, Right engines, Right exhaust pipes, Seat, Shell part 1,2, Shifter ball, Steering wheel, Tank, Tires.
The Shifter should be assembled from the detail “Shifter ball” and metal rod with diameter 1 mm and length 29 mm.
The Steering rod should be made from metal rod with diameter 1 mm and length 74.5 mm.
Right and left engines should be coupled before mounting in the frame:
- in the center of the crankshaft - with metal rods with diameter 1 mm and length 55 mm.
- through the head - with metal rod with diameter 1 mm and length 67 mm for the right engines and 60 mm for the left engines.
Central exhaust pipes should be placed between engines after the Shell mounting.
During assembling use metal pins with diameter 1 mm.
Share


Prepping and Paint
Prep and Paint instruction
removing supports
Removing Supports (If Present)
Some parts may still be attached to printing supports for protection.
Recommended Tools:
- Flush cutters / sprue cutters
- Hobby knife (X-Acto style)
- Fine sanding sticks (400–1000 grit)
- Safety glasses
Instructions:
• Work slowly — resin is rigid and can snap if stressed
• Always cut supports — do NOT twist parts off
• Hold the part securely while snipping supports
• Remove remaining nubs carefully with a hobby knife
• Lightly sand contact points smooth
For best finish quality, final sand with 800–1000 grit before priming.
Cleaning and Prep
Even fully cured resin should be cleaned before painting.
- Wash in warm (not hot) water with mild dish soap
- Gently scrub with a soft toothbrush
- Rinse thoroughly
- Allow to fully air dry before priming
Do NOT use acetone or harsh solvents.
Painting Guide
For best paint adhesion:
• Lightly scuff surface with 800–1000 grit sandpaper
• Apply a thin coat of quality primer
Recommended primers:
- Tamiya Fine Surface Primer
- Mr. Surfacer
- Automotive filler primer (larger scale parts)
Resin accepts:
- Acrylic paints
- Enamel paints
- Lacquer paints (test first)
Apply multiple light coats to preserve fine detail.
Adhesives & Instalation
These parts are resin — standard plastic model cement will NOT work.
Use:
- CA glue (cyanoacrylate / super glue) — thin or medium
- 2-part epoxy (for larger or heavier parts)
Tips:
• Lightly scuff glue contact areas for stronger bond
• Use minimal glue to avoid detail loss
• Accelerator may be used sparingly
Warnings
Important Information & Warnings
- Resin is rigid and may be brittle in thin areas
- Do not bend parts
- Avoid excessive heat (may cause warping)
- Sanding resin produces dust — wear a mask when sanding heavily
- Not intended for children under 14
- Small parts may present a choking hazard
Warping Fix
Warping Fix (If Needed)
this is iffy if it works
If minor warping occurs during shipping:
- Dip part in hot (not boiling) water for 5–10 seconds
- Gently adjust shape
- Hold in position while cooling